Map Design
- Advanced Techniques / Considerations
Gives further explanation as to how to arrange map objects (and how many objects to use) and choose map size to create balanced, fun, and replayable maps
From our very own Boggz (from the Fleet Operations' forums): Greetings, Map Makers! Kudos for even being willing to spend the time and the eyeball energy slaving over your screen to make a fun map on which we can blow shit up! This will hopefully get you acquainted with some of the common habits and "mistakes" that newer map-makers tend to make (myself included). Any object that you can place in the Map Editor will hereby be referred to as a "doodad" as it is in the Warcraft Editors. Asteroids, Nebulae, Moons, yadda yadda are all doodads.
Introduction to Map Balancing
At the moment there are only a few tangible factors in making a balanced Fleet Ops map that is still fun. I will go through a list of options and then investigate what it means based on a few factors.
Here are the first things you should consider when beginning a map, as they will very much affect balance and playability. Note that it is usually a good idea to have some sort of plan drawn on paper so that you know where the starting locations, the resource moons, nebulae and asteroids are going to be.
How Many Players?


- 2 Players
- 3 Players
- 4 Players
- 5 Players
- 6+ Players
What Type of Play is Encouraged?

- A Free For All (FFA)
- Team vs. Team
- Both
What is the Map Design?
- Symmetrical
- Asymmetrical
Common Habits of New Map-Makers
By the way, I'm TOTALLY guilty of this when new content is added or I make maps for a new game.
Too Many / Not Enough Moons
Moons are crucial to gameplay and a sufficient number have to be provided without "over-saturating" the map. Certain factions do better with fewer resources (Feds) than other factions (Rommies) and the moons have to be able to support all factions choices. Too few moons and strong early game factions will CRUSH non-early game factions. Too many moons and it becomes a tech-fest to see who can spam the most of the best unit.
Too Many Nebulae

Notice how I didn't say "too few"? Mutara (Purple) and Crystalid (Blue) nebulae are both disruptive to the game's pathing like the other nebulae, but they also provide a completely safe haven for Borg. Borg can run in and essentially be invulnerable unless they are on death's doorstep and losing a ship or two in the nebula is worth it.
Derelict Ships / Stations
Yes, yes... we all wanna finally play with that Prometheus or set up some Breen or try and make a Neutral team out there that we HAVE TO FIGHT BECAUSE THEY OWN THIS SECTOR AND AND AND ... AND ... well the effective implementation of derelicts isn't possible yet (in my opinion). Once the map is played for the second time everyone will know where those derelicts are and thus send their first scout out there to capture them. Suddenly that Cube you thought would be fun to have derelict is drifting into your base about the time you're done with your third Saber.
--DERELICTS ARE JUST TOO GREAT AN ADDITION TO A TEAM IN THE EARLY GAME--
And you might be saying "that's why I set it up so that you CAN'T get to it early game". Well ... that's fine, I guess, but keep in mind that there are lots of ways to "cheat" to get around those stopgaps.
For the time being, it is inadvisable to add too many (if any) derelict ships to your maps, as all it takes to have a working Sovereign, Cube, or McKinley yard is a single crewmen. Stations can then immediately begin recrewing and a vessel can just run back and recrew as well. One crewmember is all it takes for that ship to be mobile and have weapons online as well ... albeit at a slower firing rate.
Poor Blocking Triggers

The Blocking Triggers (F10 - Non Player Races, F2 - Triggers, F1 - Blocking) are what ACTUALLY prevent ships from moving through things. They are big, white, and ugly Hexagons that prevent ships from passing them. They do not exactly fit a single Asteroid Field doodad properly and will often have "overhang". In a game this ends up making it so you can't actually go to a certain place even if you can't see something there. This is very important when it comes to moving fleets and micro-managing your ships in battle. If for some reason you can't move somewhere that's empty you'll be tempted to utter a phrase akin to... "WAAAAH I don't know where I can go! There's nothing there!"
Solution: make sure your blocking triggers line up as nicely as possible with whatever doodads you've placed.
Placing Nebulae Over Moons or Places You Are Forced to go
It may seem fun to place moons in Nucleon (Red) nebulae and justify it by saying "oh well if you want to have those extra resources then you have to repair your freighters when they get low! It's called strategy!" In fact, no, it's called a HUGE PAIN IN THE ASS. I wouldn't want to be checking back every ten seconds. You will lose those miners and they will not even replace the amount of resources they cost to be built.
In general do not put nebulae in places where you HAVE to go through them in order to play the map. Pathing is really the biggest issue, because the little demons that work inside the game can cause oodles of very frustrating problems that will drive your fellow Gamers CRAZY (such as ships going into enemy fleets when you click to retreat, etc).
Never place Blue, Purple, or Green nebulae too close to either the beginning moon pairs or even the expansion moon sets. These resources are critical to having a decent game and should not be shadowed by utility nebulae. Borg can make almost broken use of the Purple and Blues, while everyone else can simply retreat to a Green any time they need to (or even shoot at you from inside it).
Bottlenecking
Leaving the only way in or out of a HEAVILY trafficked area a tiny passageway invites a player to line it with turrets or even a starbase. To be honest, the only real culprits of "turtling" are:
- Dominion Perimeters (of which there can only be three)
- Federation Torpedo Turrets
- Klingon Heavy Weapons Platforms

Basically it's asking a Dominion or Federation player to box themselves in and just wait due to the range and strength of the turrets involved... Romulan turrets are too weak to do this, Klingons need to go out and fight (usually), and Borg turrets cannot be packed closely together. Even if some people don’t use turrets to turtle, they can easily stay on the defensive and build up a huge fleet that stays in this small gap and make it extremely frustrating to have a game that isn’t just sit and wait. Always leave decent space (artillery range diameter) or multiple entrances into a starting base to avoid this.
NOTE: Some people really like to turtle. That's fine. However many people do not. If you want the majority of people to play your map, you should strive to avoid making bottlenecks like that.
Wormholes
Don't put wormholes too close to a person's beginning base. Wormholes right now are a VERY good way to escape a situation because ships pass into them rapidly and when they do all weapons fly off wildly. It is very easy for a fleet to show up in your base, ravage, then run back through the wormhole before you can do anything (just like how Warp was used in Armada II). Of course on the other hand, if they have three Perimeters and their ally placed 20 Mayson Torpedo Turrets…
Balancing Your Map
Balancing is the most difficult part of making the map in my opinion. Many beginning factors determine what must be done to keep your map balanced. You should always test the map balance prior to using the map in multiplayer or before you release it. Also, if the map is designed to be played with teams that are not equal in numbers, the smaller team should usually have some sort of map advantage to be able to fend off the bigger team.
Map Size

The size of the map will distinctly affect what needs to be done in order to keep it balanced.
A good rule of thumb regarding the size of the map is: "the bigger the map gets, the higher in the tech tree the first units will be". In other terms: the larger the map, the less pressure there will be.
What this means is that if the map is 50,000 by 50,000 units for a 1 v 1 game, by the time your first few destroyers make it to your opponent's base, he or she will have battleships ... The size of the map directly dictates how long the action and reaction time will be for fleets and technology.
You might ask: "What sizes are Small, Medium, and Large maps?" That totally depends on how you arrange things inside your map. Small maps, whether they be 1 v 1, 2 v 2, etc ... will increase the strength of rushing early game units, while large maps will decrease their usefulness and increase the relative strength of later game units.
Small Maps
Small maps (12k x 12k and below) should generally be reserved for 1 v 1 or maybe 2 v 2. Small maps will allow races that excel in early-game production and strength to dominate quickly and put enormous pressure on their opponent's mining and expanding possibilities. On the other hand, small maps generally make the best size for 1v1 matchups because they allow for both teching strategies as well as rushing with nearly equal balance.
Medium Maps
Maps over 12k but generally under 16k tend to favor 2v2 or even tight 3v3 matchups. This will allow harassment to make a significant difference and yield real results while not overly-rewarding a quick tech rush. Harassment is still a viable possibility in the face of a tech-up. Even in team games a quick and precise strike will generally allow you to make good use of intelligence and tactics in the face of a stronger opponent to turn the tide in your favor.
Large Maps

Best for 6+ Players. Multiple extra moon pairs is recommended as the teams will then be nearly forced to compete for them or perish. Avoid "take this area or lose" kinds of situations as people will not like them. Larger nebulae will do alright as long as they are not too strategically crucial to holding an area and do not favor a specific race too much. Fluid Nebula will be much more tolerable here as map size will generally dictate movement away from the nebula in order to make reasonable moves.
Huge Maps
8+ Players only. Maps over 25k x 25k are ASKING for a tech race. I really just don't recommend this for anything other than AI play. Human players in most cases do not like sending 3 Monsoons to their opponent's base to find a Sphere or a pair of Norexan already on the field. Highly inadvisable to make human-intended maps be this big.
Symmetrical versus Asymmetrical
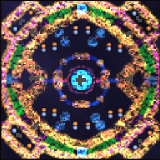
Symmetrical maps are much easier to balance. It is easier to see where the moons, the nebulae, and the "Blocking" doodads and Triggers are at in relation to each Player's starting location. Symmetrical Maps follow an inherently balanced pattern because (in theory) everybody has the exact same advantages and disadvantages. Many of our favorite maps from Stock are symmetrical, such as "The Very First Map", "First Strike", and "High Energy".
Common Features of a Symmetrical Map:
- A full Moon pair expansion near each start position.
- A central area equidistant from all starts where much fighting occurs.
- Nebulae away from the start positions, usually near the middle.
Asymmetrical maps are a little more tricky to balance. Because they are inherently uneven, it can be very difficult to make sure that each player starts off with an equal advantage to the others. It can definitely be done though and should not deter a person from at least TRYING an asymmetrical map now and then. Asymmetricals actually have fewer "rules" if you ask me, but they just have a few "rules" that absolutely CANNOT be broken lest ye nevarrrrr have yer maps be playeeedd yarrrrrrr.
Rules Not to Break on an Asymmetrical Map:
- Even moon distribution.
- The starting moons for each player must be accessible within the same amount of time as the others.
- The first and second moon pair should be accessible at equal times for all players.
- Even access to the map.
- A player should not be put RIGHT in the center of four others ... they won't like that.
Asymmetrical Map Comparison
Here are three asymmetrical maps that work under different principles:
Pure Asymmetry
"Tau Ceti 1.0" by Phoenix"

Phoenix made sure that each starting position in Tau Ceti had equal access to its beginning moon pair. The resources on that map are scarcer to encourage exploration and projection of power. He has very skillfully placed moons in places where a person would not normally go if they were not looking for resources, thus giving those areas a distinct draw. Nebulae are almost absent from the center of the map to prevent them from being abused by the Borg.
Subtle Asymmetry
"The Final Frontier II" by Boggz

With FFII, I tried to create a balanced beginning for all 6 players while causing the map itself to be uneven. If you look closely, almost all of the moons are actually symmetrical. This is because in online play people can feel they have an unfair disadvantage if the moons are not equal for all players. The difference, however, comes from the fact that the actual map doodads are arranged in asymmetrical patterns. Each area has its own feel to it and its own method of attack. Mutara (purple) nebulae are arranged so that they can be used for escape, but are NOT available in areas where "camping" would be very useful.
Conversely, there can also be asymmetrical maps that are almost completely for fun! The next map we'll look at is "Cellula Eucaritica" by The Black Baron. He has gone on to create an entire representation of a cell using the Map Editor.
Gimmick Asymmetry
"Cellula Eucaritica" by The Black Baron

Now the key thing to remember here with a "gimmick" map, is that they are for fun! They are only partially meant to be a balanced, gaming experiences and are more created for the fun of pitting the mitochondria against the nucleus! Baron created a very fun map based on a theme and it will work best for a game that is played with patience and the willingness to laugh. Expecting a fair and balanced starting is ... not likely, so just have fun!
Inspiration
Maybe ideas will spring forth into your head without any impetus at all. Perhaps all you need is to read the Fleet Operations forum, look outside your window at the crop circles, or view old real-life battlegrounds for motivation. On the other hand, perchance you’d like to take a look at the myriad of maps already created expressly for Fleet Operations.
As the official forum itself is quite cluttered with outdated or unused map designs, it can sometimes be difficult to find the map you’ve heard others rave about. It is thus strongly recommended that you peruse Phoenix’s Astrometrics website, which not only contains his quite nicely detailed maps, but also a burgeoning collection of the community’s maps. Anyone can host their maps there, so don’t be afraid to look around or even create your own section!