Federation Unit Analysis
Table of Contents
- Counter Table
- Units of the United Federation of Planets
- Venture Class - Outpost
- Newton Class - Outpost
- Saber Class - Antares Yard (passive: Tiny ECM Suite - strong avoidance of torpedoes, moderate avoidance of pulse weaponry)
- Monsoon Class - Antares Yard + Chassis Level 1 (passive: High Density Shield Generators - strong versus long range, weak versus short range)
- Intrepid Class - Antares Yard + Chassis Level 1 (passive: Autonomous Defense AI - strong versus medium range, weak versus support vessels)
- Nova Class - Antares Yard + Chassis Level 2 (passive: EPS Control Nodes - strong versus shields, weak versus pulse weaponry)
- Akira Class - Antares Yard + Chassis Level 2
- Norway Class - Antares Yard + Starfleet Science
- Canaveral Class - Antares Yard + Starfleet Science (passive: Fast Tracking Computers - strong against short range, weak against long range)
- Excelsior II Class - Eraudi Yard
- Remore Class - Eraudi Yard + Chassis Level 2
- Avalon Class - Eraudi Yard + Chassis Level 2
- Defiant Class - Eraudi Yard + Chassis Level 3 (passives: Tactical Weapon Arrays, Ablative Armor Plates - strong versus long, strong versus short)
- Sovereign Class - Eraudi Yard + Chassis Level 3 (passive: Ablative Armor Plates - strong versus short range, weak versus long range)
- Phalanx Class - Eraudi Yard + Chassis Level 3
- Special Federation Stations
- Starfleet Command
- Descent Class - Experimental Warp-In
- Teutoburg Class - Strategic Warp-In
- Galaxy Class - Standard Warp-In (passive: Tactical Weapon Arrays - strong versus long range, weak versus short range)
- Nebula Class - San Francisco Type - Standard Warp-In
- Nebula Class - Yoyodyne Type - Standard Warp-In
- Nebula Class - Rigel Type - Standard Warp-In
- Ambassador Class - Standard Warp-In (passive: High Density Shield Generators - strong versus long range, weak versus short range)
- Excelsior Class - Standard Warp-In (passive: Autonomous Defense AI - strong versus medium range, weak versus support vessels)
- Centaur Class - Standard Warp-In (passive: EPS Control Nodes - strong versus shields, weak versus pulse weaponry)
- Nova - Rhode Island Refit - Standard Warp-In (passive: EPS Control Nodes - strong versus shields, weak versus pulse weaponry)
- Starfleet Command
- Federation Turret System
Counter Table
Lists the units that the vessels of this faction counters. To see what units counter the listed vessels, visit the other Unit Analyses.
Note: A counter is considered a unit that deals superior damage to its foe (or takes less) – not one that does extra damage, yet is still more readily damaged. Only strong counters are listed as weak counters are useless unless taking into consideration superior micromanagement, which cannot be accurately predicted. An example of a weak counter is a Canaveral versus Canaveral: both take increased damage.
Blank spots do not indicate that the vessel is useless, just that it is a generalist and does not have a special passive which enables it to do more to a particular unit.
| Antares Yard Vessels | Borg | Dominion | Federation | Klingon | Romulan |
| Saber | Adaptor | A-26 Bomber, Breen Cruiser, Breen Battleship | Canaveral | Chargh, BortaS, Sang', SuS'a' | Shrike |
| Monsoon | Dodecahedron, Diamond, Assimilator (non assimilation) | B-8 War Frigate, Breen Cruiser, Breen Battleship, S-7 Defender | Saber, Excelsior, Excelsior II, Avalon, Phalanx, Galaxy | Sang’, Cho’naQ, Negh'var | Rhienn, Rhienn Disruptor Refit, Rhienn Torpedo Refit, Cehlaer |
| Intrepid | Probe, Sphere, Adaptor, Pyramid, Cube | A-20 Attack Destroyer, S-2 Escort Cruiser, V-13 Battleship, B-5 Battle Cruiser (Pure) | Akira, Nova, Nebula and Refit, Descent, Galaxy | K'beajQ, Negh'var, B'rel | Shrike, Griffin, Eresis, D’deridex, Norexan, Tavara, Generix Refit |
| Nova | |||||
| Akira | |||||
| Canaveral | Interception / Beam / Regeneration Scout Cube | A-20 Attack Destroyer, S-2 Escort Cruiser, B-5 Battle Cruiser (Breen) | Intrepid, Excelsior, Norway | K’vort, Chargh, SuS’a’, LuSpet | Shrike, Leahval, Eresis |
| Norway | A-20 Attack Destroyer, S-2 Escort Cruiser, Breen Cruiser, Breen Battleship | Galaxy, Intrepid, Excelsior | B’rel, Negh’var, LuSpet | Norexan, Eresis |
| Eraudi Yard Vessels | Borg | Dominion | Federation | Klingon | Romulan |
| Excelsior II | A-26 Bomber | Canaveral | Chargh | Shrike | |
| Remore | A-20 Attack Destroyer | Intrepid, Excelsior | LuSpet | Eresis | |
| Avalon | A-26 Bomber | Canaveral | Chargh | Shrike | |
| Defiant | Scout Cube, Dodecahedron, Assimilator, Diamond | S-2 Escort Cruiser, B-8 War Frigate, B-5 Battlecruiser (Breen) | Galaxy, Saber, Avalon, Phalanx, Excelsior, Excelsior II, Monsoon, Intrepid, Ambassador, Norway | B’rel, K'Vort, SuS'a', BortaS, Negh’var, Sang', Cho'naQ, LuSpet | Norexan, Cehlaer, Rhienn, Rhienn Disruptor Refit, Rhienn Torpedo Refit, Leahval |
| Sovereign | Scout Cube | S-2 Escort Cruiser, B-5 Battlecruiser (Breen) | Monsoon, Intrepid, Defiant, Ambassador, Norway | B’rel, K’Vort, SuS’a’, BortaS, Negh’var, LuSpet | Leahval |
| Phalanx | A-26 Bomber | Canaveral | Chargh | Shrike |
| Warp In Vessels |
Borg
|
Dominion
|
Federation
|
Klingon
|
Romulan
|
| Descent | |||||
| Galaxy | Dodecahedron, Diamond, Assimilator | S-7 Defender, B-8 War Frigate, T-15 Heavy Cruiser | Excelsior II, Avalon, Phalanx | Cho'naQ, Sang' | Cehlaer |
| Nebula and Refit | |||||
| Ambassador | Dodecahedron, Diamond, Assimilator | Breen Cruiser, Breen Battleship, B-8 War Frigate, S-7 Defender | Saber, Avalon, Galaxy, Phalanx, Excelsior, Excelsior II | Cho'naQ, Sang', Negh'var | Cehlaer, Rhienn, Rhienn Disruptor Refit, Rhienn Torpedo Refit |
| Excelsior | Probe, Adaptor, Sphere, Pyramid, Cube | A-26 Bomber, A-20 Attack Destroyer, V-13 Battleship, B-5 Battlecruiser (Pure) | Descent, Nebula and Refit, Akira, Nova, Sovereign | Chargh, K'beajQ, Vor'cha | Shrike, Griffin, Generix, Eresis, D'deridex, Tavara |
Units of the United Federation of Planets
Venture Class - Outpost

With a large sensor radius and a fast speed (equal to all other scouts) this vessel is an important tool in the Federation arsenal. Although it is equipped with a medium range, forward firing pulse weapon, this often only serves to alert your opponents that you are in their territory. Consequently, setting the Venture on green alert and low movement autonomy can often be as good as a cloaking device, especially if the Venture is stuffed in a neglected corner of your opponent's base. These settings are also sufficient to prevent it from engaging outposts it is exploring and thus let your opponent know where you plan on striking. Note that the two sensor upgrades can make this scout a marvelous early warning beacon, as you will see your opponent's fleets long before they notice yours.
When playing as the Federation it is important to immediately explore the map, beginning with all moon pairs (preferably the moon pairs your opponent is most likely to expand to) as well as the spaces in between moon pairs as this will offer you the opportunity to use your Warp-In capabilities to strike anywhere later in the game (an ideal harassment technique). Scouting early game is always the easiest because there are no enemy destroyers or turrets to harass your scout, so you can go almost anywhere you please. As your opponent expands, do not forget to investigate his/her expansions at regular intervals, as this will give you the best idea of what constitutes undefended territory.
Researched at Starfleet Science, when Progressive Scan is clicked, it will cause your Venture scout to immediately halt its movement, whereby it will emit a Graviton-Tachyon Ping a few seconds later as well as increase its sight range enormously. Every 10 seconds it will increase its line of sight a bit more, as well as emit an additional two Graviton-Tachyon Pings at increasingly greater intervals. While it is the first ping that is the most crucial for preemptive cloak detection, the two next pings are useful for catching scouts, an unaware opponent, a damaged but cloaked vessel, and preventing cloak retreats in the midst of battle. Consequently, make sure that you send your scout directly on top of the cloaking ships you are perusing before engaging Progressive Scan. Often having more than one Venture is extremely important if you want to render visible the entirety of your opponent's fleet. Remember that the Progressive Scan is also really important when fighting against non-cloakers, since you can see much of the battlefield for the half minute it is active.
Newton Class - Outpost

After a battle is over you can use a Newton to quickly repair hull and subsystem damaged ships or buildings in the field, thus allowing you greater resilience than other factions. As the Newton is not a combat ship (although it has a decent defense), it usually should not be sent to the front lines or it will simply become cannon fodder. Any smart player will quickly target these ships first, or simply switch targets much faster than you can get to that next vessel to repair it. If you do send these ships into battle, be sure to place them on high movement and weapon autonomy, but green alert, that way these repair vessels will move all around to repair warships on their own.

If you neglect to set these starships on green alert, you will soon witness their mad dash to get within close range of enemy forces only to do battle with no weapons at all. Building at least one of these vessels to keep besieged buildings or strong hulled ships alive is recommended in the later game stages. It is possible to upgrade Newton repair starships with Field Diagnostics, which will increase the defensive capabilities of the vessel and the repair rate, as well as allow the vessel to repair shields. Be aware that you should never upgrade your Newton vessels in the field of combat. The upgrades take many seconds to install, and the ship's defense become severely weakened, leaving it very vulnerable to enemy fire.
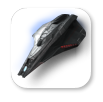
Saber Class - Antares Yard
(passive: Tiny ECM Suite - strong avoidance of torpedoes, moderate avoidance of pulse weaponry)

This long ranged, small vessel has an electronic counter measures system which generates a higher than normal miss chance for torpedoes, and even a miss chance against pulse weapon systems. Although the vessel is comparatively weak, it has a relatively fast speed and is quite cheap. As a result, the vessel can act as a good distraction as well as a decent raider in its own right. Risner's are a bit too weak to use efficiently without the Hyper Impulse Drive.
Hyper Impulse Drive (researched at Starfleet Science) boosts the velocity of this unit to level with most short ranged cruisers. Likewise, torpedo and pulse hit chance drops further, making it quite difficult to hit this unit. Hyper Impulse also causes Sabers to synergize with other Sabers, Excelsiors, and Canaverals and thus weapons fire will occasionally miss them. Sabers that are affected that do not have Hyper Impulse engaged will gain a temporary offensive boost. As offensive value drops when the Hyper Impulse Drive is engaged, if you are harassing your opposition’s mining operations and no interceptors (fast units) are close, switch the special ability off on some Sabers and do some damage. Note that the Hyper Impulse Drive takes half a minute to switch on and off, so be very careful when you decide to disengage it, as your survivability will drop dramatically. Even if you are planning to build just a few Sabers, this ability will increase their lifetime substantially as well as help your other vessels. Furthermore, since most opponents attack the weakest vessels first, if your Sabers are present your opponent will be wasting a great degree of their firepower. Likewise, if you are planning on building a quite a few Sabers for a nice long ranged and fast strike force Hyper Impulse Drive should be researched either immediately or shortly after you have produced a few Sabers, as it will greatly increase their longevity on the field of battle.
Monsoon Class - Antares Yard + Chassis Level 1
(passive: High Density Shield Generators - strong versus long range, weak versus short range)

A short ranged, small sized vessel, this SFI vessel has a passive that causes long ranged units to deal less damage to it while dealing slightly less damage to short ranged units. Consequently it is best used in the early game to counter vessels your Intrepid does poorly against, as well as driving off those pesky long ranged vessels. Since the Monsoon is so fast it can be used very efficiently as a quick strike vehicle on your opponent’s mining facilities. Even with a turret or two in place, the Monsoon can move in quickly, unleash its special weapon (if researched) on freighters and get out without being damaged very heavily due to its passive. Risner's Monsoon is not as durable as Mayson's so be more cautious when commanding her forces.

The Proximity Torpedo (researched at Starfleet Science) allows the Monsoon to fire a special torpedo which does increased damage to small, fast vessels. As a consequence, make sure you use this ability on your opponents destroyers or fast cruisers (like the B'rel, S-2 Escort Cruiser, and Leahval), and not on large sized vessels where it will not do much damage. Using it on cloaking or decloaking vessels is a great way of destroying a few ships when they are at their weakest. It is also extremely useful to use the Proximity Torpedo to decimate enemy mining vessels quickly and thus avoid return fire. This ability should be researched immediately if you are planning to build Monsoons as it boost the offense of the vessel significantly.
Intrepid Class - Antares Yard + Chassis Level 1
(passive: Autonomous Defense AI - strong versus medium range, weak versus support vessels)

Nearly as fast as the Monsoon, this medium sized vessel is armed with torpedoes and beam weaponry. Taking less damage from medium ranged warships and pulse based weaponry means it is a good counter against these types (especially when combined). Be careful to keep the Intrepid away from support vessels however, as it will do reduced damage to them as well as take increased damage. While the Monsoon is primarily geared to destroying units and freighters and then leaving the scene of the crime in a hurry, the Intrepid can stay for longer and destroy pesky turrets and mining facilities. Its torpedo based attack means it won’t miss, and it has the shielding to withstand several turrets easily enough, while having the speed to still be able to retreat before blown to bits.

The Tricobalt Torpedo (also researched at Starfleet Science) is an anti structure weapon. It deals fifty percent increased against all stations, which means that the Intrepid can go toe to toe with most expansions, as the special weapon can be used a few at a time on each turret to quickly level all defenses. Likewise, if the base is defended, you can simply use the artillery range weapon on a mining station or shipyard, retreat and repeat after special energy has recharged. Note that although the Tricobalt Torpedo is great against structures, due to the artillery range, it also offers a great way to take out retreating and badly damaged enemy warships, especially as some area damage is dealt. Although as a torpedo weapon it suffers a miss chance against medium and small sized vessels, using the ability to destroy vessels that have already lost shields is entirely feasible.
Nova Class - Antares Yard + Chassis Level 2
(passive: EPS Control Nodes - strong versus shields, weak versus pulse weaponry)

A small sized and medium ranged destroyer, the Nova is equipped with beam and torpedo weaponry. As a result of its passive and small size, this vessel will quickly succumb to pulse shots. For this reason, it is highly advised that you limit your usage of this vessel when facing pulse-heavy fleets (such as those of the Klingons and Romulans). This vessel is as fast as the Monsoon and can bunch up very easily (seeming of little threat on the minimap). Consequently, it is quite capable of making hit and run attacks on freighters, though its forward firing torpedo armament is best suited for taking out the medium sized Dominion and Borg miners. In fleet action the Nova is very much a supporting cruiser which can hide amongst your larger vessels easily – with a long build-time it is unlikely you will be able to make too many of these.

The Fleet Supply ability is researched at Starfleet Science and gives the Nova the ability to increase the firing rate of nearby Federation photon torpedo toting units (Intrepid, Remore, Akira, Galaxy, Ambassador, Excelsior), including Nova destroyers. As a consequence, this ability should always be purchased if you are building Novas – unless you are relying solely on quantum torpedo carrying vessels (Sovereigns, Excelsior II’s, Descents). The ability costs an insignificant five supply yet packs a significant punch.
Akira Class - Antares Yard + Chassis Level 2

A medium ranged and sized warship, this unit is armed with torpedoes and phasers. This unit is the powerhouse of Risner fleets and will make up the bulk of her fleets. Mayson can also rely on the Akira later game when he finally researches the chassis upgrades. The Akira is a good deal slower than your Intrepids and Monsoons, but this also allows it to guard your support vessels and Warp-In vessels much more easily. Even though the Akira will take increased damage from the K’Vort it can take heavier punishment than the Intrepid and should begin to replace it if faced by K’Vort weapon systems.

Researched at Starfleet Science, Defense Patterns uses up all the special energy, but increases the hull and shield repair rate by an enormous amount for half a minute. When being attacked, pay attention to which Akiras are being targeted to make better use of this ability. Don’t simply select all your Akiras and use this ability all at once. Likewise, note that if you simply use this ability when the Akira has had its shields barely scratched, the Defense Patterns will have been pretty much wasted. Instead, use the ability only when a larger percentage of damage has been done – something like 20-50% loss of shields. Since this ability greatly increases the resilience of the Akira, it should be researched even before the first Akira is built to ensure maximum survivability for your torpedo cruisers.
Norway Class - Antares Yard + Starfleet Science

Your first Federation support vessel, this starship belongs exclusively to Admiral Mayson’s forces. A short ranged and agile craft, this unit is rather effective against Dominion and Federation forces due to its speed, durability, and advantage against Autonomous Defense AI units. Not only can you harass effectively with this vehicle, but it will also escort your slower Warp-In units and later game Mayson vessels very easily.

The standard first level ability, Emergency Power, allows the Norway to transfer special energy to another allied unit within range. Due to Mayson’s normally early reliance on Warp In units, this can be used to devastating effects with the Teutoburg's Tricobalt Carpet special ability as well as the Nova's Fleet Supply ability. Of course, Emergency Power can be used with any vessel, so if no other special abilities have been researched for the Norway, you can easily use them to recharge the stores of your other units without sacrificing anything. It is best to use the energy on vessels that can provide aid to multiple vessels at one time.

The Plasma Coil is the Norway’s secondary ability. Researched at Starfleet Science, this ability is an area of effect weapon that does heavy damage to a few medium and small sized units over a five second time interval. Consequently, as long as units stay in range of the ability’s effect radius, they receive damage (likewise if they enter the zone after the weapon has been triggered). Like with most other area of effect abilities, using a few Plasma Coils at a time is wisest, so as to not waste your weapons. Note that since this weapon does damage to cloaked vessels as well, if you are being attacked, but your enemy is undetected to your sensors, using the Plasma Coil in the vicinity of where these attacks are coming from will allow you to quickly destroy the exposed hulls of these warships.

The tertiary ability of the Norway, Assault Mode, turns this formidable little ship into a mini-Akira. Damage from stations is reduced, and hull and repair rate are doubled. Defensive, Offensive, and System values are also boosted. Using this ability after having triggered Plasma Coil is best, as you cannot use any other special abilities until Assault Mode deactivates 25 seconds later. Likewise, keeping a few Norways deactivated and behind your fleet can also serve as a “supply depot” for any special ships that run low on special energy (again, usually most wisely used on the Teutoburg).

A small sized support vessel available to both avatars, this vessel is armed with a long range phaser and a special pulse weapon which does increased damage to destroyers. In addition it has a passive which allows it to deal increased damage to short range vessels while taking more damage from long ranged units. As a consequence, this vessel is good for supporting Monsoons and other short ranged units in fleet action, as you can expect that they will be engaged with your opponent’s interceptors, and thus the Canaveral’s weapons can pound these small or medium sized vessels from afar. However, as a long ranged vessel, it should be kept away from interceptors and long ranged beam/pulse based units which will quickly eliminate the Canaveral.

EC3M boosts the defenses of the Canaveral at the expense of all its regeneration capabilities (both special energy and shield/hull regeneration). As a consequence, if the Canaveral is going to be involved in heavy combat (i.e. relying on its passive to engage your opponent's interceptors), this ability should be switched on by default. However, as soon as it disengages from combat and is needed for its primary/tertiary ability or needs to repair, EC3M should be disengaged. EC3M also reduces the damage incurred from vessels with Tactical Weapon Arrays, thus increasing its effectiveness against ships like the B'rel and S-2 Escort Cruiser.

The Sensor Synergy special ability, available at Starfleet Science, boosts the sensor radius of a nearby station by several times. It lasts quite a while and can be used very effectively to spot ahead of your base structures to see if enemy fleets are approaching. Since the ability is cheap in terms of special energy, you can keep a station providing you with information for an unlimited amount of time, provided you keep hitting the ability.

The tertiary ability, Sensor Blackout (from Starfleet Science) consumes much of the special weapons energy of the Canaveral, but decreases the rate of fire of a few vessels in your opponent’s fleet for 25 seconds. Using this ability several times to blanket an opponent’s fleet can be very effective in reducing the amount of damage you receive. Always engage EC3M and retreat this vessel from the field of battle after making use of this special weapon – or at least make sure it is at long range – as it will not be able to use any other special abilities for some time, and will more than likely be the first to be targeted due to its relatively weak stats, long range, and size.
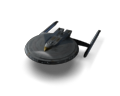
Excelsior II Class - Eraudi Yard

A long ranged and medium sized vessel, the sister chassis to the Sovereign has a rather powerful offense and defense. One of the only Federation vessels with a limited firing arc (quantum torpedoes are forward firing only) the Excelsior II is excellent against larger structures and units. For both avatars this unit is quite useful for engaging the larger of your opponent's units, but bear in mind that the Excelsior II will have a very hard time retreating without being picked off. Escort these artillery cruisers well, as once they are put into battle they are consigned to their fate due to their slow speed and firing arc.

Guided Quantum Torpedoes (researched at Starfleet Science) increase the hit chance on the quantum torpedoes to 100% accuracy and thus makes the Excelsior II very strong against even small sized units. However, the vessel becomes stationary and thus you must be extremely careful when positioning your vessels at the onset of combat for fear that they may face in the wrong direction or out of range! Still, this ability is a must have on the field of combat as it allows you to quickly pulverize ships of all sizes. Mayson's Guided Torpedoes come standard with Anti Capital Ship Torpedoes, which deal increased damage against your opponent's battleships (not simply large-sized ships). Keep this in mind when considering the Defiant and Vutpa', which are both medium-sized battleships. Likewise, even though Guided Quantum Torpedoes normally has few uses against the Borg (as most of their small and medium vessels will not be built later game), the Cube is a slow battleship and thus vulnerable.
Remore Class - Eraudi Yard + Chassis Level 2

A high technology support vessel, this medium ranged and sized unit is relatively slow. Escort it and if necessary, let it hang back from combat as its special abilities can be impressively useful. Due to their high tritanium costs, building these vessels while high dilithium cost units (like the Akira or Excelsior II) are being constructed can be quite efficient. For Risner, often this vessel will be built in much higher numbers than for Mayson. Its torpedo launcher is forward firing only.

Coming standard with the Precise Volley special ability, this torpedo spread will completely strip the shields off any destroyer or cruiser in Fleet Operations. It will eliminate about 80% of the shielding of a typical battleship as well. Accordingly, this vessel should be prolific in your fleet, even without its other abilities researched – as long as you are willing to micromanage them to each target a separate vessel. Against stations this ability is also quite useful, as it exposes the hull of stations quite quickly. A handful of Remores can prove quite a threat to even the best armed station for this reason. Note that this ability is entirely useless against the Borg, so be sure to advance up to at least the secondary ability immediately.

The secondary ability, Vector Calculation (researched at Starfleet Science), lends the high powered computer systems of the Remore to another allied vessel to allow it to fire a great deal more shots for a full minute. If well micromanaged, a few Remores using this ability on your most powerful vessels (such as Akiras, Excelsior II’s etc) can allow your fleet to become significantly more powerful. Since this ability practically depletes the energy stores of the Remore with one usage, make sure to retreat the Remore to allow you to use it again. You really won’t miss the firepower, especially after having used Vector Calculation.

The tertiary ability, Point Defense is a weapon which neutralizes most torpedo weapons (the exceptions are special weapons and Klingon Photon Rack missiles) within a dogfight (shorter than short) radius. While it is active, it can shoot down all torpedoes for about 12 seconds. Since the radius is so small, it will be difficult to provide complete cover with only a single vessel. Thus keeping your Federation fleet clustered close together can be of significant strategic value. If you only have a few Remores and a small fleet, have them lie back, with only one of them in the fleet at a time using this ability. When depleted, retreat the vessel and move in another. Likewise, it will be harder to pick out the Remore if all your ships are closely packed together. If you have very good micromanagement skills, you can even switch the ability on and off to target volleys of torpedoes, rather than drain the energy all at once.
Avalon Class - Eraudi Yard + Chassis Level 2

A large sized battleship with a long range phaser, Risner’s fighter carrier is ploddingly slow (and expensive in terms of supplies). However, its pulse-based fighters are an excellent screen to absorb untrained enemy firepower, all while attacking from a safe distance. For this reason, its fighters can often be used to drag unsuspecting vessels into the jaws of your fleet. Most vessels will take equal damage from the Avalon due to the phaser armament.

Fighter craft will automatically spawn from the vessel and attack any ships within range. Bear in mind that the fighters are easily destroyed and thus offer pretty much free kills to your opposition if you do not support them. Fighters will follow the attack orders of the mother carrier unit, and if you want them to stop attacking a particular unit, just hit the stop command. The vessel is best used in fleet action because the fighters will act as easily replaced (and free!) canon fodder and will offer a very nice attack boon. Unsupported, the Avalon and its fighters are easy prey. Fighters share the resistances and strengths associated with the parent unit (in this case, a long ranged unit).
Defiant Class - Eraudi Yard + Chassis Level 3
(passives: Tactical Weapon Arrays, Ablative Armor Plates - strong versus long, strong versus short)

Coming standard with not just one, but two passive abilities, this medium sized battleship is quite agile. The Defiant takes reduced damage from short range units and deals increased damage to long ranged targets. With strong pulse based weapons and passive abilities which increase damage dealt to long range targets, this interceptor is best suited for taking on small and medium sized vessels. Note however that the Defiant is particularly vulnerable to Borg Holding Beam and Auto Assimilator abilities due to its low crew. The Defiant can also perform as a late game strike force unit. With its powerful shielding and attack, and quite reasonable speed, a few of these units can easily move into your opponent's mining facilities and pick off miners while shrugging off turrets with ease. Building a few of these for just that purpose can thus be rather wise, as they are very difficult to get rid of.

Critical Shot (researched at Starfleet Science) allows the Defiant to completely disable another vessel’s weapon systems for twelve seconds and deal a moderate amount of damage. Although the vessel’s basic weaponry is best for handling non battleships, its special weapon usually makes it quite indispensible when fighting large priority targets. Using a few sequential Critical Shots to keep a powerful starbase or Borg Cube from using any weapons for an entire battle can be very effective. If you are planning a last assault on an opponent’s base, or are expecting to face high priority targets (large sized units) researching the Critical Shot is quite useful. If you are not facing many medium or small sized vessels, researching Critical Shot immediately is necessary, as the Defiant will be purely a support role due to its pulse based weaponry.
Sovereign Class - Eraudi Yard + Chassis Level 3
(passive: Ablative Armor Plates - strong versus short range, weak versus long range)

With the same armor as the Defiant, this large, medium ranged battleship takes much less damage from short ranged units although it deals slightly less damage to long ranged targets. With quantum torpedoes and beam weaponry, this vessel can actively target your opponent’s battleships and large structures for maximum effect. Avoid torpedo based ships like the Sang’, Veqlaragh, Excelsior II’s ACS, A-26 Bomber. In engagement where you face greater numbers of large vessels, produce more Sovereigns accordingly. For these reasons this battleship is a good substitute for the Excelsior II in later game stages. Note that in battles where small size vessels are most prevalent, the Defiant is a better choice.

Researched at Starfleet Science, Distortion Field is an area of effect weapon which shuts down the engines of all effected nearby units and deals damage based on a unit’s speed (the faster the speed, the more damage incurred). Understandably, this special ability does the most damage to interceptor type units, and thus the ability complements the role of the Sovereign as a fleet ship most perfectly. Any short ranged units that try to bombard your long ranged Federation units will quickly find themselves adrift and heavily damaged. For this reason, keeping Federation fleets clustered can be quite efficient at reducing the damage you take. If you face a good deal of interceptor type units, this ability should be researched even before you produce your first Sovereign. If interceptors (fast and small units) are rarer, this ability will become more of a specialized support, to allow you to destroy ships that would have otherwise escaped the attack of your fleet. A handful of Sovereigns using Engine Overload can do a large amount of damage to destroyers and even most cruisers.
Phalanx Class - Eraudi Yard + Chassis Level 3

Risner’s large sized battleship comes armed with phasers and pulse weapons. Keep in mind that its special Magnan Phaser is forward firing only (as are the pulse weapons of course) and deals area damage. Much faster than the typical long ranged battleship, because of its armament it is an excellent late game escort which specializes at destroying those small and medium size interceptors which will plague your fleet. Note that the Sang’, Veqlaragh, SuS’a’, S-2 Escort Cruiser will be quickly destroyed by the Phalanx, even if the battleship is easily damaged by them.

Researched at Starfleet Science, the Hypercharge Magnan Emitter charges the special array of the Phalanx to fire a small area of effect beam weapon which excels at damaging your opponents clustered small sized units (many short-ranged interceptors). Since you will be building the Phalanx as an anti small and medium sized unit in the first place, researching the special ability quickly is of great importance.
Special Federation Stations
Starfleet Command


Every three minutes (provided you have enough slots available) you have the option of calling either an emergency Standard Warp-In or Experimental Warp-In to any previously explored location. If you select a Warp-In to arrive in a nebula, note that it will appear on the outskirts. Starfleet does not send its ships into potentially corrosive nebulae! The Experimental Warp-In sends but a single powerful vessel to assist, while the Standard Warp-In will send three randomly assorted and limited production units. Note that although the vessels themselves are technically free, if they should be destroyed on your watch, a number of supplies will be deducted for each Warp-In ship lost.


Although it takes time for the ships to warp across the map and be handed over to the player’s control, this ability can be used very effectively offensively (especially on large maps where expansions are normally hard to get to), as well as to discourage your opponent’s attacks on your mining facilities. Simply causing them to Warp-In at that newly constructed (or constructing) and poorly defended expansion can result in an early victory. In larger maps this means that the Warp-In becomes an incredibly powerful harassment ability since only the cloaking factions get close to such an excellent unavoidable attack system.
Usually your opponent is so focused on protecting his/her expansions from attack that they leave their base undefended. This of course gives you the perfect opportunity to Warp-In ships to attack their main-base mining with impunity (as long as you do not let your ships get too close to your opponent’s starbase). If you use your Warp-In aggressively you can cause normally offensive sneaky factions (such as the Romulans) to become defensive by fear of losing valuable mining ships and stations if they do not leave behind vessels or defensive structures.
After building Starfleet Command, make sure to give it a hotkey to allow you to call reinforcements in the midst of battle. Note that any Standard Warp-In vessel upon reaching officer rank (rank 4) will no longer count for a Warp-In slot. When an Experimental / Strategic Warp-In reaches officer rank the player will gain back one Warp-In slot. Sometimes keeping a reserve Warp-In if you have a large fleet can be useful for late game harassment or for intercepting your opponent’s harassment forces. If all else fails, you can always target your own Warp-In vessels (or better yet, decomission them for some resources!) to free up some slots for that late-game Descent-class.
Descent Class - Experimental Warp-In

A powerful large sized and not-too-slow battleship, this experimental unit does most of its damage through limited arc quantum torpedo bursts, but also excels at taking damage due to its strong shielding. Consequently it is not too powerful against small vessels, although it can easily absorb their hits. As a result, although this starship can be used in a Warp-In assault to destroy a weaker structure where its torpedoes will actually hit, (such as a mining facility) it excels in fleet action, rather than in lone combat.
The Breen Battleship, Breen Cruiser, A-20 Attack Destroyer, Intrepid, LuSpet, Leahval, Eresis will take decreased damage from the Descent. The Descent will take the least damage from all pulse based units. Avoid torpedo based ships like the Sang’, Veqlaragh, Excelsior II, A-26 Bomber, SuS’a’.

With its Shield Reset special ability, the Descent essentially has two lives. This ability affects all other allied vessels and stations in the vicinity, close to instantly recharging their shields to full strength. This vessel can be used as a last ditch effort to provide your starbase with its full shielding (provided you keep the Descent touching the structure) as well as to help in fleet action when an area of effect weapon has damaged the shields of nearby vessels. Often a group of Descent and Newton classes can sit behind your forces, allowing you to peel off damaged ships to be repaired and have their shields recharged. To make the best use of the Descent's ability (which costs supplies), be sure to use it on at least one very powerful unit, or a bunch of damaged and less important vessels.
Teutoburg Class - Strategic Warp-In

A medium sized, quite slow warship, this vessel has a limited firing arc and deals all of its damage in the form of torpedoes. These torpedoes have reduced accuracy compared to normal torpedoes (they are not guaranteed a 100% hit chance against large-sized vessels, only stations), but they are fired from an immense distance. The ability to fire across strategic range enables the Teutoburg to provide cover fire while far from the front lines. In fleet action, enemy vessels will have to either destroy your normal vessels to get to a properly positioned Teutoburg, or they will have to race across your lines to get within range. Either way, this artillery-vessel can prove to be a powerful annoyance to enemy commanders. Dealing such heavy damage with its torpedoes means that the Teutoburg is a skilled anti-Borg vessel, especially if you are being harassed or enclosed at your bases.

The Tricobalt Carpet grants the vessel the capability to fire volleys of Tricobalt Torpedoes while energy (and the ability) last. These torpedoes behave in the same manner as those of the Intrepid, dealing 50% extra damage to structures and having a slight area of effect. Obviously this ability comes in handy to demolish structures more quickly, although it can of course be useful when targeting larger units as well.

Surgical Strike Patterns gives the Teutoburg the chance to disable its target's weapon systems for a short time. This can allow you to more easily destroy your opponent's turrets and starbases, as the Teutoburg can disable the weapon systems from afar, while your normal fleet enters shorter range to finish off the structure. Again, this can be useful against ships, but because the chance to miss is so high, it is unlikely you will disable many vessels. If you are planning on just demolishing a structure from a distance and do not have to provide cover fire, it is best to save your energy for the Tricobalt Carpet.
Galaxy Class - Standard Warp-In
(passive: Tactical Weapon Arrays - strong versus long range, weak versus short range)

A medium ranged and large sized battleship, this vessel is middle of the line in terms of speed and matches most other faction’s heavy cruisers for stats. The Galaxy’s passive allows it to deal increased damage to long ranged targets at the cost of taking more damage from short range units.

The Galaxy also has a secondary ability, Type 3 Torpedoes. This is a switcheable ability which, when enabled, lowers the Galaxy’s shield recharge rate slowly, but fires three independently targeting torpedoes. Against the early game destroyers and freighters that you will most likely be facing, this ability is quite useful as even though you will damage each individual target slower, since all three take damage, your opponent must retreat all three units when they do lose much of their health. It is doubtful that you will be able to kill one of these small units, unless your opponent is really poor in terms of micromanagement. Even despite doing much of its damage through torpedoes, the Galaxy can provide good cover against your opponent’s small units when you do a Warp-In rush. Against larger vessels, the single torpedo weapon is more efficient. Likewise, when out of combat, deactivate the Type 3 Torpedoes to allow more rapid shield regeneration.
Nebula Class - San Francisco Type - Standard Warp-In

A medium ranged and large sized cruiser, this starship also comes out in roughly the heavy cruiser department. With the same speed as the Galaxy, but with only phaser weaponry, this ship can much more easily damage your opponent’s destroyers and freighters due to the lack of a miss rate. However, the Nebula is fragile and not very heavily armed, so it is best used for battlefield reconnaissance.

The Nebula’s standard special weapon, Full Scan, reduces the offensive capabilities of the Nebula to a point where they are almost of no consequence. In return the sensor abilities of the Nebula are greatly enhanced for half a minute, allowing you to see quite a bit more of the battlefield. Combined with the Federation’s sensor upgrades, in the absence of Canaverals this can allow you to spot encroaching enemy fleets from a good ways away. Furthermore, as the Canaveral can only spot using allied stations, the Nebula can allow you to keep an eye on the battlefield anywhere on the map.
Nebula Class - Yoyodyne Type - Standard Warp-In

Also a medium ranged and large sized cruiser, this vessel is more aptly equipped for war with rapid fire photon torpedoes and a phaser.

For the cost of a handful of supplies, the Tactical Torpedo Pod boosts the energy regeneration rate of the Nebula Refit for a short while, granting you the ability to fire multiple special weapons which are unlocked. The Tricobalt Torpedo (dealing double damage to stations) and Proximity Torpedo (dealing high damage to small and medium sized units) must be researched to be used, but Precise Volley (dealing damage to shields only) comes standard.
Nebula Class - Rigel Type - Standard Warp-In

Another medium ranged, large sized cruiser, this Nebula has a very high defense and average offense. It is equipped solely with a phaser. The vessel itself is quite fast and often can be attached to slightly faster Intrepid fleets to provide additional longer-ranged firepower.

For the cost of many supplies, this cruiser may place a Pulse Platform near its location. The exact location cannot be determined (the vessel will place the turret slightly ahead of the forward facing of the unit, provided there are no obstacles), but this allows the ship to act as an additional "constructor" when low on normal resources or civil units. The vessel will remain stationary and uncontrollable for one minute, after which it will beam out its turret. This capability can be used offensively to place turrets at your opponent's resource moons. However, as the vessel is vulnerable to attack and cannot halt production, it is usually necessary to distract your opponent in order to place it (even if the vessel does have a strong defense). Likewise, it is often best to attempt to place the turret in such a way that it will not be closer to enemy stations than to enemy ships (warships or freighters). Since the Pulse Platform cannot be controlled after being set up, auto-targeting will cause the unit to fire upon the nearest enemy unit.
Ambassador Class - Standard Warp-In
(passive: High Density Shield Generators - strong versus long range, weak versus short range)

Another large sized cruiser, this vessel is armed with short ranged torpedoes and phasers and is faster than most non-interceptors. The Ambassador’s passive reduces damage taken from long range while decreasing its damage dealt to short range targets. Its torpedo launcher is forward firing only.

Coming standard with a purely defensive special weapon, Energy Rerouting increases the defensive value substantially and reduces the damage caused by torpedoes, at the cost of a reduction in speed. Ideally because all of these replace weapons cause attacking vessels to switch targets, this ability should be used when the Ambassador is the last unit standing (or is being attacked exclusively by a watching opponent). Use it immediately in these cases because the Ambassador loses subsystems relatively rapidly.
Excelsior Class - Standard Warp-In
(passive: Autonomous Defense AI - strong versus medium range, weak versus support vessels)

A long ranged, medium sized vessel, this slow and aging destroyer can rapidly unleash a hail of photon torpedoes as long as it has special weapons energy. Taking less damage from medium ranged warships and pulse based weaponry means it is a decent counter against these types. Bear in mind that it will do both decreased damage to support ships as well as take more damage from them however. Due to the slow speed of this unit, and relatively weak stats compared to the other Warp-In units, try to keep this vessel at its maximum range and retreat it when it is being targeted, as this will allow it to also regenerate special weapons energy and thereby be a better torpedo platform.
Centaur Class - Standard Warp-In
(passive: EPS Control Nodes - strong versus shields, weak versus pulse weaponry)
A medium ranged, small sized vessel, this destroyer is equipped with phasers and limited-arc rapid firing torpedo weaponry. The unit deals increased damage to shields, while taking increased damage from pulses. Due to its speed and size, the vessel can easily be grouped with Intrepids, and even Monsoons if you don't mind the slightly reduced speed.

Remote Shield Control allows the Centaur to command a nearby Platform (either Torpedo, Pulse, or Phaser) to donate its shields to any Centaur within range. The vessels will regain 100% of their shield strength, but the turret will lose all of its own. As a result, this ability is very rarely useful. Only if there is no nearby yard, and attack is not imminent, is it usually wise to use Remote Shield Control. Since any Platform without shields is a sitting duck, this is more useful if you have been harassing far from home, and your opponent is equally far off from a distant expansion.
Nova - Rhode Island Refit - Standard Warp-In
(passive: EPS Control Nodes - strong versus shields, weak versus pulse weaponry)
This variant of the Nova is a small sized destroyer, equipped with medium ranged phasers and forward firing quantum torpedo weaponry. Like the normal Nova, it deals increased damage to shields, while taking increased damage from pulse weaponry. It is an extremely fast ship, and can be grouped with any speedy warship due to this (such as Monsoons or Intrepids). It has a powerful defense and offense and will usually be one of the best surviving ships on the battlefield: it can retreat quickly, deal extensive damage, and take a large amount of punishment. Treasure these vessels.

Extended Fleet Supply allows the Nova to provide additional quantum torpedoes for any units capable of carrying such armament, at the expense of a small number of supplies. This includes Excelsior II, Sovereigns, and Descents and allows these already heavy-hitting vessels to deal incredibly amounts of damage. The ability is self-buffing and thus allows the Nova to give herself additional damage-dealing capabilities. The ability has a wide area of effect and thus does not require much micromanagement.
Federation Turret System
Platform

This is the initial turret hub built by the Mediterranean construction ship. Able to be instantly transformed into three useful turrets, the Platform is cheap and has a weak defense. Building one per mining outpost is highly recommended to protect your assets. If you are under threat of cloaking ambushes, be sure to hotkey this station and float a few hundred dilithium so as to be able to upgrade the turret into a defense station. Note that while upgrading, the defense of the Platform is reduced, so it is still often necessary to upgrade in advance of an attack.
Sensor Platform


With a moderate defense and system value, the Sensor Platform automatically emits a medium range Tachyon Ping. The Sensor Platform is fairly cheap and comes standard with Intelligence Report. This ability is fairly expensive, but is useful in the late game to determine where cloaked ships are located. A Sensor Platform at each mining outpost can be quite useful in not only spotting cloaked vessels slightly before they attack, but it will also allow you to catch a few vessels as they try to flee the scene.
Pulse Platform
(passive: Ablative Armor Plates - strong versus short range)

This turret is armed with medium-ranged pulse weaponry. The turret is equipped with a passive which reduces damage taken from short ranged vessels and due to its pulse weaponry it will be most efficient against destroyers and especially short ranged ones. In a pinch a Platform can be quickly upgraded to this turret and dissuade harassment from most early game vessels. Admiral Mayson's turret is armed with more powerful quantum pulse weaponry.
Phaser Platform

The Phaser Platform is an excellent long range turret, though it is not equipped with a passive. These turrets are very nice defense platforms for their cost and are available early in the game. If you are planning on defending your mining assets for the long term, placing a Phaser Platform can pretty much stop most raiding. Note that the cost does mean you will be less likely to field vessels. Admiral Mayson's turret is armed with deadlier Type XV Phaser weaponry.
Torpedo Platform
(passive: Ablative Armor Plates, Single Stage Energy Conduits - strong versus short range, strong versus medium range)
Launching a withering hail of artillery-range fire at enemy vessels, the Torpedo Platform is a powerful late game turret which does increased damage to medium ranged vessels, while taking reduced damage from short ranged units. However, the turret is also prohibitively expensive, and thus only in the rarest of circumstances will you actually want to purchase such a behemoth. Building a Torpedo Platform represents a phenomenal investment so that unless you have been pushed back to your base or aren't relying on ships for defense, this turret will weaken, not strengthen you. Admiral Mayson's turret is armed with stronger quantum torpedo weaponry.
Note that the sensor range of this turret is actually smaller than its weapon range, so artillery can bombard it successfully unless you place a sensor platform nearby.
