Klingon Unit Analysis
Table of Contents
- Counter Table
- Units of the Imperial Klingon Empire
- NoQ’Duj Class - Kahless Station (passive: Superiority Fighter - can kill any other scout if in close range)
- Topmey Class - Kahless Station
- B’rel Class - Field Yard (passive: Tactical Weapon Arrays, Manual Tageting – strong versus long range, keeps cloaking ships visible)
- K’Vort Class - Field Yard + Field Research (passive: Single Stage Energy Conduits - strong versus medium range)
- K’beajQ Class - Field Yard (passive: The Everlasting Design - almost never loses a subsystem)
- SuS’a’ Class - Field Yard + Field Research (passive: Extra Energy Stores - strong versus structures)
- Veqlaragh Class - Field Yard + Field Research
- Sang’ Class - Battle Yard
- Qaw’Duj Class - Kahless Station and Battle Yard + Armory
- Chargh - Battle Yard (passive: Fast Tracking Computers - strong versus short ranged)
- Vor’cha Class - Battle Yard + Armory (passive: Ablative Armor Plates - strong versus short range)
- LuSpet Class - Battle Yard + Armory + Ordnance Depot (passive: Autonomous Defense AI, Cluster Torpedo Launcher - strong versus medium range, weak versus support vessels)
- Vutpa’ Class - Battle Yard + Armory + Ordnance Depot (passive: Targeting Scrambler, Manual Targeting - rarely hit by torpedo weaponry, keeps cloaking ships visible)
- Vutpa' Class Refit (passive: Targeting Scrambler, Manual Targeting - rarely hit by torpedo weaponry, keeps cloaking ships visible)
- Cho’naQ Class - Imperial Yard
- BortaS Class - Imperial Yard + Armory + Ordnance Depot + Imperial Research (passive: Ionized Hull - immune to ion storms)
- Negh’var Class – Imperial Yard + Armory + Ordnance Depot (passive: Tactical Weapon Arrays – strong versus long range, weak versus short)
- Special Klingon Stations
- Klingon Turret System
Counter Table
Lists the units that the vessels of this faction counters. To see what units counter the listed vessels, visit the other Unit Analyses.
Note: A counter is considered a unit that deals superior damage to its foe (or takes less) – not one that does extra damage, yet is still more readily damaged. Only strong counters are listed as weak counters are useless unless taking into consideration superior micromanagement, which cannot be accurately predicted. An example of a weak counter is a Canaveral versus Canaveral: both take increased damage.
Blank spots do not indicate that the vessel is useless, just that it is a generalist and does not have a special passive which enables it to do more to a particular unit.
| Field Yard Vessels | Borg | Dominion | Federation | Klingon | Romulan |
| K't'inga | |||||
| B’rel | Diamond, Dodecahedron, non Auto-Assimilators | A-26 Bomber, S-2 Escort Cruiser, Breen Cruiser, Breen Battleship, S-7 Defender | Saber, Excelsior, Excelsior II, Avalon, Galaxy | Sang’, Cho’naQ | Rhienn, Rhienn Disruptor Refit, Rhienn Torpedo Refit, Cehlaer |
| K’beajQ | |||||
| K’Vort | Probe, Adaptor, Sphere, Pyramid, Cube | A-20 Attack Destroyer, C-11 Interception Destroyer, C-17 Siege Cruiser, V-13 Battleship, B-5 Battle Cruiser (Pure), S-2 Escort Cruiser, Breen Cruiser, Breen Battleship | Akira, Remore, Galaxy, Nebula and Refit, Descent, Nova | B’rel, Negh’var, Vutpa', Qaw’Duj, K'beajQ | Shrike, Griffin, Generix, Generix Spectre / Support Refit, Norexan, Eresis, D’deridex, Tavara |
| SuS'a' | Breen Battleship, Breen Cruiser | Galaxy | Negh’var | Norexan | |
| Veqlaragh |
| Battleyard Vessels | Borg | Dominion | Federation | Klingon | Romulan |
| Chargh | Interception / Beam / Regeneration Scout Cube | B-5 Battle Cruiser (Breen) | Defiant, Ambassador, Intrepid | LuSpet, BortaS, Negh'var | Leahval |
| Sang’ | Breen Cruiser, Breen Battleship | Chargh | |||
| Qaw’Duj | A-20 Attack Destroyer | Intrepid, Excelsior | LuSpet | Eresis | |
| Vor'cha | Scout Cube | S-2 Escort Cruiser, B-5 Battle Cruiser (Breen) | Defiant, Monsoon, Intrepid, Ambassador, Norway | Negh'var, B'rel, BortaS, K'Vort, SuS'a', LuSpet | Leahval |
| Vutpa’ | Assimilator, Adaptor, Pyramid, Diamond | A-26 Bomber | Akira, Sovereign, Excelsior II, Nova, Descent, Nebula Refit | SuS'a', Sang', Chargh, Veqlaragh, BortaS | Rhienn Torpedo Refit |
| LuSpet | Probe, Adaptor, Sphere, Pyramid, Cube | V-13 Battleship, B-5 Battle Cruiser (Pure), A-20 Attack Destroyer, S-2 Escort Cruiser | Akira, Nova, Galaxy, Nebula and Refit, Descent | Negh'var, K'beajQ | Shrike, Griffin, Generix, Generix Spectre Refit, Eresis, Norexan, D'deridex, Tavara |
| Imperial Yard Vessels |
Borg
|
Dominion
|
Federation
|
Klingon
|
Romulan
|
|
Cho'naQ
|
|
A-26 Bomber
|
Canaveral
|
Chargh
|
Shrike
|
|
BortaS
|
|
A-20 Attack Destroyer
|
Galaxy, Excelsior, Intrepid
|
LuSpet, Negh’var
|
Norexan, Eresis
|
|
Negh'var
|
Dodecahedron, Assimilator, Diamond
|
S-7 Defender, B-8 War Frigate, Breen Battleship, Breen Cruiser
|
Excelsior II, Avalon, Phalanx, Excelsior, Galaxy
|
Cho’naQ
|
Rhienn, Rhienn Disruptor Refit, Rhienn Torpedo Refit, Norexan, Cehlaer
|
Units of the Imperial Klingon Empire
NoQ’Duj Class - Kahless Station
(passive: Superiority Fighter - can kill any other scout if in close range)

A short ranged scout, this vessel can serve two purposes in the early game. As a result of its equal speed to all other scouts, as well as its armament, it can safely engage and destroy all of the other faction's own scouts as long as you keep it in range. Note however that it will lose much of its hull in a duel with a Borg Detector, which might cause the NoQ'Duj to also lose a subsystem - a dangerous gamble. Too cost inefficient to be used in any significant numbers to form a hunting pack at any stage in the game, preferably this vessel will be used to scout out your opponent. Although the line of sight of this tiny warship is small, the vessel is indispensible for intelligence gathering. If this ship is in your opponent's base, don't leave it too close to his or her starbase or other defensive stations in case your opponent decides to use the Graviton Detection Grid. Oftentimes, keeping just the edge of the sensor radius over your opponent's shipyards and/or research stations is all that is needed to stay informed on his or her production schemes. Use this ability to your advantage, and check those stations often!
In most 1v1 battles, a minimum of two scouts are needed. One to tell you what your opponent is building - or what is at his or her base - and the other to either scout out vulnerable lone freighters and construction ships, or to follow your opponent's fleets (usually using the guard command). In this scouting role, it is best to place the NoQ'Duj on low movement autonomy and green alert - this way in case it somehow becomes decloaked, it does not rush into battle at the first sign of an enemy warship's engine trail. Usually it is wise to build the second NoQ'Duj after you have already established an expansion or after your original queue of freighters, so that you are not stalling a queue of Topmey.
Topmey Class - Kahless Station
A slow, unarmed freighter, this vessel can also jettison its cargo containers when in range of a Klingon mining station to become an ancient, but speedy, K't'inga Class destroyer. Using this ability can be a bit of a gamble, as you can either continue mining when attacked and lose the ship in the throes of resource gathering (and give your opponent the ability to level up), or you can reach deep within your forgotten Klingon heritage and pull out that disruptor - never mind how weak it is - but still technically "lose" the miner.
Even if a few K't'inga seem rather weak, every bit of firepower helps, and most folks can't tell the vessels apart from the K'beajQ - especially if the two are mixed. Thus, the K't'inga can even be used later on as an annoying harasser, or even a scarecrow to make your forces look more dangerous than they actually are.
It must be noted that TaQ'roja's Topmey is 20% cheaper than Martok's and both have a very fast build time. As a consequence, it is quite feasible for TaQ'roja to produce only Topmey from the Kahless Station and begin harassing from the start. A B'rel, for comparison, takes about 40 seconds longer to produce. Thus, a Field Yard can begin producing B'rels or K'beajQ, while the Kahless Station commissions Topmey that are turned into K't'inga immediately. This can give you are very large force early on, despite the fragility of most of the vessels. Keep in mind that the ratio of dilithium to tritanium that the Topmey consumes is much closer to a 1:1 ratio than other Klingon vessels, but the supply costs for this unit are higher in comparison. Topmey can also be used as scouts due to their cheapness.
B’rel Class - Field Yard
(passive: Tactical Weapon Arrays, Manual Tageting – strong versus long range, keeps cloaking ships visible)

This short ranged, but very fast pulse armed destroyer, comes with a passive which causes it to deal increased damage to long ranged units, but be battered by short range units (although less so than other vessels that are equipped with Tactical Weapon Arrays, due to a mitigating passive). If you are facing long-ranged units, these vessels are your key to victory. Make a strong effort to stay away from Shrikes which will disable the B'rels weaponry and be careful around Auto-Assimilators or troop carriers due to the B'rel's low crew count. Note that Manual Targeting gives the B'rel the ability to continue firing upon cloaking ships, rendering them visible to all your forces as long as the B'rel keeps firing on that poor vessel. Blow them to Gre'thor! As a consequence, it is usually quite wise to have each B'rel target a different cloaking ship to prevent their escape.
Due to the speed and agility of this warship, using it as a hit and run unit on your opponent’s mining vessels or stray construction ships and lone warships is extremely feasible. Even if there is a single turret in the region, a pack of two to three B’rels can move in, destroy the miners and get out without losing a single B’rel if well managed. A mining facility without miners is useless and can even be used to lure in additional freighters to their inevitable doom. As a result keeping a few B’rels in packs and relying on efficient scouting can allow you to keep your opponent on his or her toes. Even lone B’rels left in your opponent’s mining colonies can wreak havoc to freighters. These wolfpacks are fiendishly hard to catch as your main fleet will undoubtedly use the disruption to engage more heavily defended installations.
Note that TaQ'roja's B'rel gain more supplies per level up and do a portion of their damage through the use of torpedoes. As a consequence her Bird of Prey are less effective against destroyers, although equally effective against medium sized warships (and more against stations). The addition of the torpedoes also make the B'rel an excellent defense station killer, as not only do they deal 100% damage, but most stations are equipped with long ranged weaponry, allowing the B'rel to deal additional damage to them.

Weapon Fatigue (researched at Field Research) increases the offensive and defensive capabilities of the B'rel for more than half a minute, as well as boosting the warship's speed. Although the ability costs supply to use, if the B'rel kills any opposing unit while under the effect of the ability it will level up, regaining both the lost supplies as well as the proper amount due to rank-up. Likewise, the unit gains a chance to levelup per shot with the same result. Also, just by clicking the ability you gain a chance to levelup at the end of the ability, but you will not gain any supplies through this method. As a result the ability is useful for both fleet engagement and harassment, as you will always get a sizeable chance to levelup, as well as gain some supplies.
K’Vort Class - Field Yard + Field Research
(passive: Single Stage Energy Conduits - strong versus medium range)

Although slightly slower than the B’rel, this pulse armed cruiser is fitted with weaponry that allows it to damage medium ranged vessels more easily. This vessel is used most efficiently against small or medium sized vessels. As this vessel is nearly as fast as the B’rel it can also be used in similar hit and run attacks, but due to the increased costs it is not necessarily worth pulling this ship out of fleet duty to perform these tasks. Since the K’Vort is very similar to the B’rel in many respects, you can use it to perform the same duties as the B’rel once you have teched up. In that respect, the K'Vort is a much better counter to Breen Cruisers and Excelsior II’s than the B’rel, as it can take much more punishment. Note that the K'Vort's subsystems are extremely fragile, and most hits to the hull will knock out life support, engines - you name it. Consequently, pay attention to what units or abilities deal direct hull damage to the K'Vort, and remember that cloaking in the midst of battle with the K'Vort can be a huge liability.
Note that TaQ'roja's K'Vort deals nearly 50% of its damage in the form of heavy hitting torpedoes. As a result, the vessel can easily be used late game as well as to make short work of stations, although the Bird of Prey is much less effective against destroyers (although still quite effective against medium sized vessels). Supplement these K'Vorts with K'beajQ to make up for this failing.

The Shield Breaking Torpedo ability (researched at Field Research) allows the K’Vort to easily snipe your opponent’s freighters or especially his or her support vessels without decloaking. As most vessels have about 2/3 of their hitpoints in their shields, this ability can be used to great effect against otherwise powerfully shielded vessels. Using this torpedo to actively destroy the smaller vessels of your opponent upon first engaging combat can be quite a powerful tactic as you will reduce oncoming firepower significantly without having to damage the shields first. Consequently, when opening combat, target your K’Vorts on vessels other than the ones you plan to engage with the Shield Breaking Torpedo. This ability should be researched when you have a few K’Vorts already built because it dramatically boosts their effectiveness in battle.
K’beajQ Class - Field Yard
(passive: The Everlasting Design - almost never loses a subsystem)

A medium ranged and moderately quick vessel which will never lose a subsystem, the K’beajQ is the powerhouse of your Klingon fleets – much as the K’t’inga was in its day. If you need ships to fill out your fleet, yet can’t quite tech up to Battle Yard vessels or have too many funds to spend (and don’t need SuS’a’ or Veqlaragh support) the K’beajQ is key because of its respectable firepower, decent special weapon, and great resilience. However, be careful not to rely on the warship too long, as it costs quite a few supplies.
Due to its durability, it can safely retreat from battle even with much of its hull damaged (you do not have to worry about it losing life support or engines like you do with other Klingon destroyers). Its beam based weaponry means that it will outlast the usefulness of your K’Vorts and B’rels because it does equal damage to every unit and structure and can retreat from battle while continuing its barrage. Consequently, when you no longer should be building K’Vorts (no more small or medium sized, medium range vessels are being fielded, or you do not have the funds) this is the vessel to construct. Keep in mind that the K'beajQ, being a small destroyer, will take the most damage from pulse based weapons.


For both avatars this vessel can be outfitted with a special ability at Field Research. Martok’s K’beajQ can be outfitted with a Torpedo Drone which will never miss its target. TaQ’roja’s K’beajQ can be outfitted with a Heavy Disruptor which will deal slightly more damage to destroyers than the Torpedo Drone. Both deal base damage to all other units. If interceptors (fast units) are not very close by, both of these abilities can be used to take out your opponent’s freighters immediately after decloaking. As these special weapons take an extremely long time to cool down, make sure that when entering target you use these weapons exclusively to pick off the warships which can do the most damage to your fleet (if it is centered on K’beajQ, take out the medium range destroyer specialists first). In larger fleet engagements (usually more than eight K’beajQ), allowing this weapon to be placed on high weapons autonomy will be sufficient, but you will waste firepower. Try to research the special ability as soon as possible (possibly while your first two vessels of this class are building) as it adds significant firepower. Waiting until a enemy has begun to cloak before using this ability can also be extremely efficient, as you will assuredly destroy at least a few vessels in this manner.
SuS’a’ Class - Field Yard + Field Research
(passive: Extra Energy Stores - strong versus structures)

A Martok-only vessel, this warship has a passive which increases its damage to structures at the expense of having weaker shields. If your opponent is building mainly turrets, it is thus wise to have mainly SuS’a’ warships being fielded. With their dual forward firing torpedoes, they will never miss the structures and will quickly demolish them. Your K’vorts or B’rels will play mop up duty and take out the freighters and far fewer numbers of opposing small or medium sized warships. Likewise, although the SuS’a’ does not get a bonus against units, these vessels are best fielded against large targets since the torpedoes will hit every time. Against medium or small units, usually your early game pulse or beam armed units will do a much better job. Large sized vessels (most Borg units and non-Borg battleships) will fall especially quickly against SuS'a'. Keep this vessel especially away from the Vutpa’ (where most torpedoes will miss).
This vessel can also pull double shift as a harasser, where instead of efficiently destroying far off freighters like the B’rel and K’vort can do, it will obliterate the mining facilities themselves. Consequently, if you aren’t facing too many turrets or battleships, building a few SuS’a’ for very cruel harassment purposes can be quite successful.

Last Ditch Assault (researched at Field Research) gives your SuS’a’ a very powerful offensive burst for a long period of time, followed by a short cool down period where offensive power drops below normal, and the ability to cloak is lost while the effects are active. This ability is a must if you want to destroy something quickly and effectively – especially in the case of regenerating Borg vessels. To reduce the risk of overkill, don’t simply select all SuS’a’ and use their special ability. Instead use the ability of a few (perhaps four) of these vessels at each time, that way you do not quickly kill one or two targets with a barrage of torpedoes and then lose all your firepower at once. The ability is expensive, so only research it if you have a few SuS’a’ already in the field and need to take down something fast (like a large vessel that can retreat and repair, or a Starbase).
Veqlaragh Class - Field Yard + Field Research

As TaQ’roja-only pirate ships (excuse me, I mean “warships”), these fragile vessels come standard with artillery range 360 fire weaponry. However, even despite their high speed, they must be supported and escorted by other units at all times. Since their only weapons are in the form of torpedoes they are best used to bombard base structures and capital ships from a distance. Keep these artillery units well behind the front lines, because pulse armed units and interceptors can make mince meat out of them very quickly.

Alternate Armament gives your Veqlaragh vessels a secondary role – namely that of preventing your opponent’s vessels from closing with you or escaping. This is especially useful when facing large, powerful vessels, in particular those that have inferior range to your main fleet (for instance, a short ranged Negh’var) or those that are “directionally challenged” (Norexans). If this role is crucial to your gameplay – for instance you are facing down mainly larger caliber Borg vessels (like Spheres) or the battleships of your non-Borg opponents, you should expect to begin research immediately. Building at least five or six of these vessels to prevent retreats is necessary, while maintaining much of your fleet as a screen to prevent opposing vessels from breaking through and destroying the deadly but rather delicate artillery.
Sang’ Class - Battle Yard

These small cruisers are quite powerful for their size, but alas they are also somewhat slow. Nonetheless, their strong hulls insure that you can often get away with bombarding your opponents buildings and larger vessels only to cloak and take minimal damage – assuming that no interceptor units are nearby of course. With that being said, keep these vessels away from vessels that take less damage from long ranged units, or that can quickly catch up to the Sang'. It is highly recommended that you keep these units behind your front lines while your own interceptors prevent them from being destroyed as their firepower is quite valuable. Much like the Veqlaragh, these vessels should be escorted due to their slow speeds. Make sure that the Sang’ target large vessels exclusively (while your interceptors target your opponent’s small and medium units), that way you do not waste too much firepower hitting vacuum.
If you don’t need the extreme range of Veqlaragh artillery and prefer a great deal more resilience (as well as the ability to bunch up and thus escape attention a bit better), it is wiser to build Sang’. Likewise, if you are concentrating on building Field Yard units, building the Sang’ can free up that Yard to build non “anti-structure/anti large ship units”. The Sang’ also offers a higher tech alternative to the SuS’a’ if you need some middle game anti-structure warships. Since it has not only a more powerful attack and defense, but will also likely be further away from the battle and thus less likely to be targeted first and destroyed, this is often a wise ship to pick. The downside is that it does not have an ability like Last Ditch Assault, which makes the SuS’a’ significantly stronger offensively – if only for a bit.

Compound Torpedoes (available at the Armory) give a bit more firepower to the Sang’, but because they are multi-targeting (the torpedoes spread out across the units in the field), you usually do not notice much of an effect unless you have a great deal of these vessels amassed. As a result, this ability is really only really worth it if you have a lot of extra dilithium and tritanium sitting around as will happen late game when the supply crunch begins.
Qaw’Duj Class - Kahless Station and Battle Yard + Armory
The first true Klingon support vessel, this medium ranged warship can hold its own in a conventional battle as well. If you have a glut of tritanium, building some of these vessels is a good way to right your resource imbalance. However, since it does most of its damage from torpedo weaponry, it is best used on medium and larger sized vessels. This vessel is a good counter to units with Autonomous Defense AI as it will deal increased damage to them and take decreased damage. As it is slower than many of your other warships, its best role in an early game fleet is a tank for your other vessels. Remember that you can also build it from your starbase, although the build time is twice as long as when built from the Battle Yard.

The Qaw’Duj’s standard first level ability improves its already decent stats for half a minute and can be quite useful if you are facing other support vessels, as it receives immunity from all special abilities while taking much less damage from the rest. Activating this ability upon entering battle is strongly recommended, especially as almost enough special energy will remain to use even the tertiary ability. Due to the special energy cost and cool down time of this ability, if you are a good micromanager, you can use this ability without any interruption. Even without the second or third level ability, this vessel is a rather powerful warship.

The secondary ability, Ionizing Torpedo, (researched at the Armory) is an offensive ability. Use this attack to prevent your opponent from using their own special weapons against you. As support vessels usually can regenerate special weapons energy fairly quickly, using the Ionizing Torpedo on mainstream vessels which have but a single special ability is wisest, as their system values and energy reserves are lowest (for instance, the Intrepid, Monsoon, refitted Rhienn etc). Against the Borg, this ability is usually somewhat useless due to their massive system values, but can help in taking down units like a regeneration capable Sphere or Pyramid. This ability requires a good deal of micromanagement to be effective, which is usually only possible in smaller battles. As a consequence, setting this unit on high weapons autonomy is possible if only the second tier is researched, but bear in mind that it will waste much of your special energy on a single already-drained vessel.

The tertiary ability, Polaron Field, (also researched at the Armory) deals no damage, but is extremely effective at incapacitating an opponent’s vessels as it will disable random subsystems for several seconds. Firing between two to three Polaron fields in one location is your best bet for disabling all subsystems and leaving your opponent without any fighting capability or even the possibility of retreat. Remember that the area of effect is limited, so spread these triplet volleys out amongst your opponent’s vessels to get the best results. Note that the third ability is obviously the least micromanagement intensive and is in general much more useful than the secondary. Later in the game these vessels will be selectively targeted, so try to move a few into the field of battle, discharge the Polaron Field, and move out again. Even though you will be losing some firepower, if you can keep them alive you will be able to use Polaron Field again in quick succession.
Chargh - Battle Yard
(passive: Fast Tracking Computers - strong versus short ranged)
This medium sized and medium ranged cruiser (available only to TaQ’roja) has a passive which causes it to do more damage to short ranged units, but take more damage from long ranged targets. However, because the Chargh is armed solely with torpedoes, this vessel is only really useful in the middle or later stages of the game when you are facing large or medium sized warships (especially due to its variable damage ion torpedoes). Although, as mentioned below, in fleet action its special weapon could prove useful in situations where units the Chargh is not equipped to deal with are fielded. Due to the Chargh’s medium range and the long range of most turrets or base defenses, they do not make very good station demolishers, and thus relying on the Sang’, SuS’a’, or Veqlaragh for this role is more intelligent.

The Combat Tractor Beam (researched at the Armory) gives the Chargh the ability to snare any vessel and prevent it from moving for about 25 seconds. This ability can be used on the field of battle to prevent long ranged units, like the Excelsior II, from retreating, and “directionally challenged” units or short ranged units like the Norexan and Negh’var, respectively, from firing. It can also be a great asset against the Borg, to prevent their most powerful or regeneration-capable vessels from escaping into a nebula or staying out of range before you can destroy them (such as the Sphere, Pyramid or Cube). If you identify a veteran enemy warship and want to destroy it, you can simply use the Chargh’s ability and nuke it. Your opponent will be forced to try and retrieve the veteran, or leave it behind. Either way, you have chosen the circumstances of the battle, which gives you the advantage. The special weapon is not very expensive, so researching this weapon is useful right from the start, when you only have a few Chargh class warships. Even if the Chargh will not enter your fleet as a counter to your opponent's mainline warships, consider building a few Chargh just for the special weapon. Note that due to the nature of this special weapon, setting it on high weapons autonomy is ill-advised, as this will be extremely inefficient. Always be sure to choose what targets you wish to snare with the Combat Tractor Beam to get the most use from the ability.
Vor’cha Class - Battle Yard + Armory
(passive: Ablative Armor Plates - strong versus short range)

This venerable, medium ranged, limited arc warship has ablative armor which is most powerful against short range attackers. Easily able to retreat under fire – even with shields gone – you can think of this vessel as a larger cousin to the K’beajQ. Similarly, after you have constructed the Armory, the disruptor armed Vor’cha can become a core vessel in many situations. However because of its long construction time and limited firing arc, it is important to build other vessels. The Vor'cha cannot kite enemy vessels, it will not be available in as many numbers, and it will be of no use in a retreat that is designed to deal damage to chasing vessels.

The Polaron Torpedo (researched at the Armory) fires a projectile that deals a sizeable amount of direct hull damage to the target and disables a random subsystem for ten seconds. Using this ability one at a time against high priority targets (such as battleships, and defensive stations) and then seeing which subsystem has been disabled is a very effective means of neutralizing these units. Despite the expense, this ability should be researched as soon as is feasible (preferably after you have finished one or two Vor’cha attack cruisers), since it is a very effective assault weapon.
LuSpet Class - Battle Yard + Armory + Ordnance Depot
(passive: Autonomous Defense AI, Cluster Torpedo Launcher - strong versus medium range, weak versus support vessels)

The earliest large vessel available to Martok, this short ranged, but quite speedy warship has a passive which allows it to take the least damage from medium ranged vessels at the expense of dealing less damage to support units and taking increased damage from them. Its special cluster torpedoes also cause it to deal part of its damage as direct hull damage, which will quickly damage subsystem weak vessels and weaker hulled cruisers. Attack Destroyer, K’beajQ, Vutpa', S-2 should be handled by your other units since the LuSpet’s torpedoes will miss much more frequently against these small targets. Chargh, A-26 Bombers will be a larger threat as both have passives which will increase the amount of damage they do against the LuSpet. In general avoid engaging purely torpedo armed forces without having support in the form of faster interceptors. Although the defenses of this battleship are quite powerful, torpedoes will always hit it. The LuSpet's torpedo launcher is forward firing only.

Field of Fire (researched at the Ordnance Depot) is an area of effect weapon which deals direct hull damage to up to five units over a short period of time. Ideally this should be researched immediately, as this grants your LuSpets significant striking ability. Although it may seem like a good idea to simply select all of your LuSpets and trigger the ability at once, using this ability a few at a time on the battlefield limits wastage. Try to use this ability on weaker hulled vessels (Defensive Value less than 20) whenever possible, as not only are they more likely to have weaker system values (weaker hull repair) but they might even be destroyed outright. Bear in mind that battleships and even some cruisers have high system values that will negate this damage-over-time ability - especially if you are facing Romulan or Borg warships.
Vutpa’ Class - Battle Yard + Armory + Ordnance Depot
(passive: Targeting Scrambler, Manual Targeting - rarely hit by torpedo weaponry, keeps cloaking ships visible)

Although classified as a battleship, this vessel is medium sized and has medium ranged weaponry. Equipped with multi-targeting sure-hit torpedoes as well as disruptor armament, this unit is understandably a good anti-destroyer. In addition, it has an excellent torpedo avoidance rate due to the Targeting Scrambler passive (36% hit chance) and is fast enough to close with long or artillery ranged units that would threaten other units in your fleet. Consequently, this is the vessel to build if you require a durable unit for fleet action which can quickly destroy opposing Sang’, Veqlaragh, SuS’a’, A-26 Bomber, Rhienn Torpedo Refits and thus protect your torpedo shy battleships. Note that Manual Targeting gives the Vutpa' the ability to continue firing upon cloaking ships, rendering them visible to all your forces as long as the Vutpa' keeps firing on that poor vessel. Blow them to Gre'thor! As a consequence, it is usually quite wise to have each Vutpa' target a different cloaking ship to prevent their escape, although since it multi-targets it will keep a maximum of two enemy ships visible. The Vutpa' in general is a fleet engagement warship: it is designed to deal damage to multiple ships, and you can't control where its projectiles end up. Thus it allows you to damage many ships at once and support your own vessels with its low defensive value (tanking) and by causing your own ships to thin the enemy fleet much faster.

The Concussion Missile Launchers special ability is researched at the Ordnance Depot and essentially gives the Vutpa' the ability to fire a ton of multi-targeting projectiles. Obviously good for weakening the constitution of your opponent, it can be especially useful to trigger these weapons when your opponent is cloaking to deal maximum damage. Damage dealers are always welcome, so be sure to purchase the research when you can afford it.
Vutpa' Class Refit
(passive: Targeting Scrambler, Manual Targeting - rarely hit by torpedo weaponry, keeps cloaking ships visible)

The Vutpa’ can also be upgraded to troopship status by researching the Call to Arms ability at the Armory, and then refitting the actual vessel for an additional cost. This will give the Vutpa’ the Transporter Assault special ability, which causes it to deplete a target’s shields and thereupon begin to transport Klingon warriors without lowering shields. The refit also grants additional warriors. If using this warship to capture enemy vessels, be sure to exclusively target weakly crewed vessels (such as most destroyers) while pounding the more powerful vessels with the normal weaponry. The Transporter Assault (or normal transport) set on high weapons autonomy can also be very useful when enemy vessels attempt to retreat and cloak, thereby dropping their shields. Lastly, the ability can be used to keep your own weakly crewed vessels from being captured or assimilated. Upon refitting the Vutpa' loses its Concussion Missile Launchers.

The refitted Vutpa' also can be equipped with the Mass-Seeking Missiles ability at the Ordnance Depot. These missiles only target nearby cloaked vessels and will knock out the weapon systems of up to three, causing them to decloak and suffer subsystem damage. The Vutpa' has enough energy to launch three volleys of these specially designed missiles before it must recharge.
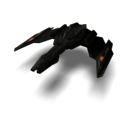
Cho’naQ Class - Imperial Yard

A long ranged, very slow, medium sized vessel, this warship deals constant damage with its very heavy hitting disruptor, but may only fire so long as it has special weapons energy. As a consequence, though its damage per second is quite high (despite the seemingly small Offensive Value), do not be fooled: running out of special weapons energy before the warship can destroy its target means that another vessel of half the offensive ability will easily be able to destroy the same target while the Cho’naQ is stuck trying to bring down shields. Usually the intermittent beam of the Cho’naQ (after special energy has been exhausted) just barely matches shield regeneration of most vessels.

The Energy Buffer (researched at Imperial Research) reduces the special weapon energy needs by 50%, but the original issues with the Cho’naQ remain. In short, the vessel is probably better used as a building demolisher as it is unlikely to waste special energy. However, a sizeable number of these vessels are needed, and due to their slow speed they must be escorted and attacks prepared well in advance. Keep the Energy Buffer switched off when not in combat, so as to allow the vessel to approach its quarry in a more reasonable time scale. Probably the ship and research are not the best use of your funds, even with Martok’s increased defensive value.

Although only one of three military Klingon vessels that is produced without a cloak device, by researching Large Scale Cloaking Devices at the Imperial Research, this warship will become equipped with a standard Klingon cloaking device. For such an obscene price, however, it is unlikely that you will research this ability.
BortaS Class - Imperial Yard + Armory + Ordnance Depot + Imperial Research
(passive: Ionized Hull - immune to ion storms)

Another short ranged vessel, this is your second Klingon support ship. However, this unit is much more of a standalone vessel than the Qaw’Duj. With decent offense and defense and a very high systems value, this vessel has very powerful shield and hull regeneration capabilities. Due to the special nature of this vessel, it will be rarely used in mainstream combat although it is a powerful warship.

The BortaS’s primary ability is the is the Attack Probe. Although it costs a good amount of special energy (more than half of the total reserves) and 7 supplies, the probe is quite strong and thus can bolster a fleet with additional attack power. It can be used while the cloak is active.

The secondary ability, Advanced Cloak (also at the Imperial Research), allows the vessel to cloak like most other Klingon vessels. This ability can also be extremely useful later in the game because the BortaS can approach its targets while cloaked, only to decloak, use the Ion Storm ability and beat a hasty retreat. The Advanced Cloak cannot be detected by normal Tachyon Pings.

The tertiary ability is the Artificial Ion Storm and is researched at Imperial Research. This creates a large area of effect nebula around the BortaS, which does heavy damage to all units – friend or foe – except for the BortaS. Coupled with the MoQ’bara station’s Battle Plan ability, this weapon can cripple mining operations and destroy most ships – especially if your opponent is not paying attention. It is usually best to use more than one Ion Storm per mining operation (to insure complete destruction) or for ambushing an opponent. Due to the strong System Value, the BortaS will most likely be able to make it out of a heavily defended base, only to regenerate all systems quickly and be able to strike soon after. Often, setting several Ion Storms in the path of your opponent’s fleet while you shell him or her with Veqlaragh or Sang’ vessels can be quite effective, especially if you lay them in such a way that your opponent has to travel a nice distance to get out of them (so don’t necessarily lay them all on top of each other). Another extremely effective strategy is to trigger the Ion Storm from several BortaS class vessels on your opponent's main fleet, and then decloak a few nearby Qaw'Duj and use sequential Polaron Field abilities to ensure that no enemy vessels can leave the area. You can be certain that all that will be left will be debris! Each BortaS has just enough energy to lay a single Ion Storm. and is more conducive to fleet action.
Negh’var Class – Imperial Yard + Armory + Ordnance Depot
(passive: Tactical Weapon Arrays – strong versus long range, weak versus short)
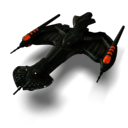
A short ranged, but relatively fast battleship, this warship is quite cost efficient – especially for Martok who receives a large defensive boon. It deals much of its damage through its torpedo volleys, which makes it a wonderful station and large unit demolisher. The warship has a passive which enables it to deal increased damage to long ranged units, at the expense of taking more damage from short ranged vessels.

Weapon Overload (researched at Imperial Research) fires a very powerful torpedo at long range which can destroy most destroyers in a single hit. Since the Weapon Overload prevents your Negh’var from firing torpedoes for a full thirty seconds, using the special weapon can be a gamble. As a consequence, if you are entering battle with a large enemy fleet, do not use Weapon Overload at the start to blow away a few units as you will be left without most of your weaponry for that time. Instead, use Weapon Overload when a Negh’var is nearing destruction, when you are faced by only a few high priority targets, or when enemy battleships are trying to escape (either by cloaking or other means). If you are using your Negh’var as a relatively fast strike force, use the special weapon immediately, a few at a time (so as not to waste the weaponry) upon any buildings in the area, and then retreat.
Although only one of three military Klingon vessels that is produced without a cloak device, by researching Large Scale Cloaking Devices at the Imperial Research, this warship will become equipped with a standard Klingon cloaking device. For such an obscene price, however, it is unlikely that you will research this ability.
Special Klingon Stations
MoQbara’ Station


When the Battle Plans ability is activated the special causes all allied regular weapons (not special weapons, except for the Ion Storm) to do 75% more damage for up to ten seconds. It is best to use this ability when you or your allies are beginning combat, or when using the Ion Storm ability. Keep the MoQbara’ station hotkeyed so that you will have the station at the ready when you need to use it. Although the station is available at the top of the Klingon tech tree, since it dramatically improves the effectiveness of all Klingon units in combat, building it as soon as you can afford to – even at the expense of more ships – can be quite a boon.
Klingon Turret System
Scout Station
(passive: Tachyon Ping - detects all in-range cloaked vessels)


Emitting a medium ranged Tachyon Ping, the Scout Station can be used to give you a bit of advanced warning for non-Advanced Cloak units as well as help you chase after cloaking harassers. The Scout Station also comes standard with Intelligence Report. This ability is fairly expensive, but is useful in the late game to determine where cloaked ships are located. The station is not very expensive, and thus a few of them can be setup around your mining facilities and extensive research stations.
Heavy Weapons Platform
(passive: Ablative Armor Plates, Fast Tracking Weapons: strong versus short range, weak versus long range)

The Klingon's multi-targeting defense turret is incredibly powerful, both in Offensive and Defensive Value. Likewise, its passives make it incredibly good at dealing damage to short range attackers as well as absorbing damage from them, at the expense of taking slightly more damage from long ranged attacks. Although it takes a relatively long time to construct, it can scare most would be attackers away - especially considering that most harassment units are short range. However, as it is so expensive, building these turrets will stop you from producing many ships. As a consequence, it is best used when forced into a defensive posture, or when you need to defend against cloaking attacks. Rarely will you build these in mainstream combat, as the funds are much better spent on vessels for the glorious Imperial Defense Forces.